 English
 Deutsch
 Français
 Italiano
 Español
 Português
 Nederlands
 Polski
 Русский
 日本語
日本語 한국어
한국어 العربية
 China Faucet Factory & OEM/ODM Faucet Manufacturer
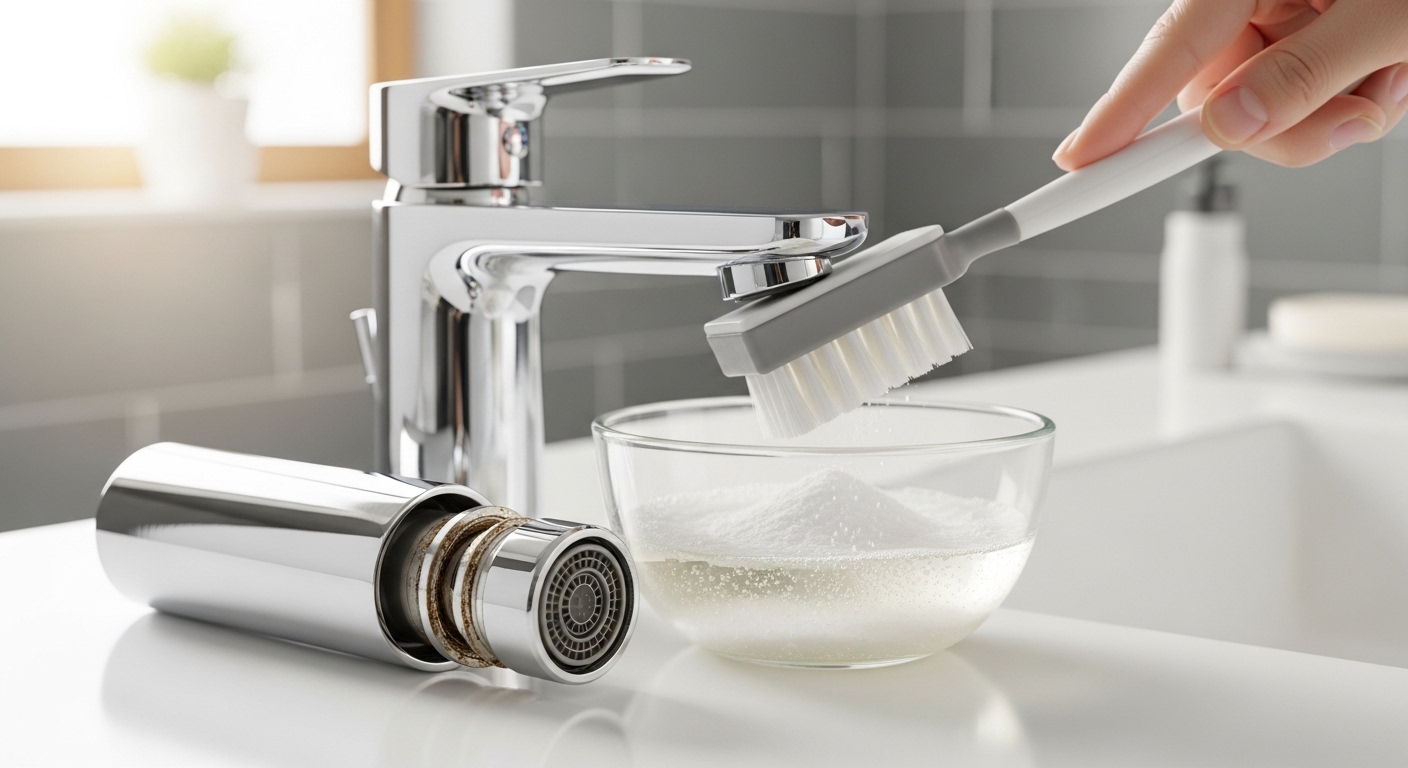
Learning how to clean faucet head with vinegar and baking soda is one of the most useful low-cost repairs any homeowner can do, and it solves the single most common complaint we hear about kitchen and bathroom faucets: weak, uneven, or splashy water flow. When your once-strong stream turns into a dribble or sprays sideways, the culprit is rarely the valve or the cartridge — it’s the small mesh screen and aerator at the very tip of the spout that has filled with calcium and magnesium deposits. The good news is that you don’t need harsh chemicals or special tools. Two pantry staples and about 30 minutes of soaking time will restore your faucet to full pressure.
At Viga Faucet, we manufacture and pressure-test thousands of faucets every week, so we see exactly how mineral buildup behaves inside a spout. In this guide we’ll share the same maintenance routine our quality team uses, plus the finish-safe precautions most online tutorials leave out.
Why You Need to Know How to Clean a Faucet Head With Vinegar and Baking Soda
Every time water leaves your tap, it carries dissolved minerals. In hard-water regions — which covers roughly 85% of the United States — those minerals crystallize the moment water sits still at the spout tip and slowly cement themselves onto the aerator screen. Over months, the open mesh that’s supposed to mix air into your water turns into a crusty white plug.
The symptoms are easy to recognize:
- Water pressure that has gradually dropped even though your home’s supply is fine
- A stream that splits, sprays sideways, or splashes the sink
- Visible white, green, or rust-colored crust around the spout opening
- A faucet that drips after you shut it off because debris holds the aerator open
- Cloudy or gritty water on first turn-on
Vinegar works because acetic acid chemically reacts with the alkaline calcium carbonate scale, breaking it down into water-soluble compounds that simply rinse away. Baking soda (sodium bicarbonate) is a mild, non-scratch abrasive that lifts the softened residue and neutralizes any lingering odor. Used together — in the right order — they handle both the chemical and mechanical sides of the job without harming chrome, brass, or stainless components.
Tools and Materials You’ll Need
Gather everything before you start so you’re not hunting for supplies mid-repair. Nothing here costs more than a few dollars.
- White distilled vinegar (5% acidity — standard cleaning vinegar)
- Baking soda
- An old toothbrush or soft nylon brush
- A small bowl and a sandwich bag with a rubber band (for in-place soaking)
- Adjustable wrench or pliers, plus a soft cloth to protect the finish
- A toothpick, sewing needle, or paperclip for clearing individual holes
- Microfiber cloth for final polishing
Step-by-Step: How to Clean a Faucet Head With Vinegar and Baking Soda
Step 1: Remove the Aerator (If You Can)
Most faucet heads unscrew. Wrap the tip in a soft cloth to protect the finish, then turn counterclockwise by hand — many come loose without tools. If it’s stuck, use pliers or an adjustable wrench gently over the cloth. There are two thread styles: male threads on the outside of the spout, and female (hidden, recessed) threads that need a special key. If your aerator is recessed and you don’t have the key, skip to the bag-soak method in Step 4. When you remove it, note the order of the small parts — the screen, the rubber washer, and the flow restrictor all need to go back the same way.
Step 2: Pre-Rinse and Inspect
Hold the disassembled aerator under running water to flush loose grit. Hold it up to the light. If you can see daylight evenly through every hole, the clog is minor. If half the screen is opaque with white scale, you’ll want the full soak. This is also the moment to check the rubber washer — if it’s cracked or flattened, replace it, because a worn washer causes drips no amount of cleaning will fix.
Step 3: Soak in Vinegar
Place the aerator parts in a small bowl and cover completely with undiluted white vinegar. Let them soak for 30 minutes for light buildup, or up to a few hours for heavy crust. You’ll often see tiny bubbles forming on the deposits — that’s the acid actively dissolving the calcium. Avoid soaking longer than overnight, and never use vinegar on solid brass or specialty PVD/oil-rubbed bronze finishes for extended periods, as prolonged acid contact can dull living finishes.
Step 4: The No-Removal Bag Method
If your aerator won’t come off, fill a sturdy sandwich bag halfway with vinegar, slip it over the entire faucet head so the spout is submerged, and secure it with a rubber band. Let it hang for 30–60 minutes. This soaks the scale in place and works surprisingly well for both kitchen sprayers and bathroom spouts. The same trick is the standard fix for clogged shower heads.
Step 5: Apply the Baking Soda Scrub
After soaking, sprinkle baking soda directly onto the wet toothbrush — or make a thick paste with a teaspoon of baking soda and a few drops of water. Scrub the aerator screen, threads, and spout opening. The softened scale will lift off easily. For stubborn flecks lodged in individual holes, work a toothpick or needle through each one. Baking soda’s fine grit cleans without scratching the metal, which is exactly why it’s safer than steel wool or scouring pads.
Step 6: Rinse, Reassemble, and Test
Rinse every part thoroughly under running water — leftover baking soda can leave a chalky film. Reassemble the aerator in the correct order (screen, washer, restrictor, housing), screw it back onto the spout hand-tight, and add a quarter-turn with the cloth-wrapped wrench. Run the water. You should see a full, aerated, bubble-rich stream with no sideways spray. If flow is still weak, the clog may be deeper in the line — see our troubleshooting section below.
Vinegar and Baking Soda vs. Other Cleaning Methods
Plenty of products promise to descale a faucet. Here’s how the homemade approach compares to the alternatives, based on what actually holds up against limescale without damaging finishes.
| Method | Cost | Scale Removal Power | Finish Safety | Best For |
|---|---|---|---|---|
| White vinegar + baking soda | Very low | Strong on calcium/lime | Safe on chrome & stainless; limit time on brass/bronze | Routine maintenance & most clogs |
| Lemon juice | Low | Moderate (weaker acid) | Very gentle, pleasant smell | Light buildup & odor |
| Commercial CLR / descaler | Medium | Very strong | Can etch delicate finishes if left too long | Severe, hardened scale |
| Bleach | Low | Poor on scale (it’s a disinfectant, not a descaler) | Corrosive to rubber washers and some metals | Not recommended for aerators |
| Replace the aerator | Low–medium | N/A (new part) | Always safe | Cracked, stripped, or corroded units |
For 90% of households, the vinegar-and-baking-soda routine is the sweet spot of cost, power, and safety. Reserve commercial descalers for cases where the scale is so old it’s turned rock-hard, and if your aerator is physically damaged, replacing it is faster than cleaning. If you’re not sure what size or thread you need for a replacement, our faucet aerator adapter kit buying guide breaks down sizes, thread types, and smart upgrades.
Finish-Safe Cleaning: Protecting Chrome, Brass, and Stainless
Not every faucet head reacts to acid the same way, and this is where careless tutorials cause real damage. The finish on your faucet determines how long it can safely sit in vinegar.
- Chrome and stainless steel: The most forgiving. They tolerate full-strength vinegar soaks and baking soda scrubbing without issue.
- Solid brass (polished or unlacquered): Limit vinegar contact to 30 minutes and rinse thoroughly. Acid can dull bright brass over long exposure. Brass remains one of the most durable faucet materials, which is exactly why it’s worth caring for — we explain its advantages in why brass faucets are the best choice for your home.
- Oil-rubbed bronze & matte black (PVD/living finishes): Be cautious. Prolonged acid can strip the patina. Use short soaks, or stick to the lemon-juice or plain warm-water method.
- Gold and brushed nickel: Generally PVD-coated and durable, but avoid abrasive scrubbing pressure — let the baking soda paste do the work gently.
The quality of the underlying plating matters too. A faucet with thick, properly bonded electroplating shrugs off routine cleaning for years, while cheaply finished units can flake. If you want to understand what separates long-lasting fixtures from disposable ones, our breakdown of how to choose a durable bathroom faucet covers the five manufacturing processes that determine real-world lifespan.
When Cleaning Isn’t Enough: Troubleshooting Persistent Low Flow
If you’ve cleaned the aerator and flow is still weak, the problem lies deeper. Work through these in order:
- Check the supply valves. The shut-off valves under the sink may be partially closed. Open them fully.
- Inspect the cartridge or valve. A worn or scaled-up cartridge restricts flow and causes drips. If your tap also feels stiff or leaks, the valve may need replacing — follow our walkthrough on how to change a kitchen tap valve.
- Flush the supply lines. Remove the aerator entirely, place a bucket under the spout, and run hot then cold water for 15 seconds to blast out debris from the lines.
- Check the pull-out sprayer hose on kitchen models — kinks and clogs in the hose reduce pressure.
- Consider full removal. For deep corrosion or a faucet that’s reached end of life, sometimes a clean replacement is the smarter move; here’s our guide on how to remove a kitchen faucet safely.
One more tip: if cleaning helps for only a few weeks before the clog returns, your water is exceptionally hard. A whole-home or under-sink water softener will protect not just your faucets but your entire plumbing system and water heater.
How to Keep Your Faucet Head Clean for Good
Prevention is far easier than repair. A few small habits keep mineral scale from ever reaching the clog stage:
- Wipe the spout dry after heavy use — standing droplets are where scale begins.
- Do a quick vinegar bag-soak every 3–4 months as routine maintenance, before buildup hardens.
- Keep a spare aerator on hand so a quick swap is always an option.
- Install a water softener if you’re in a hard-water area — it pays for itself in fixture longevity.
- Avoid abrasive cleaners and steel wool on the faucet body, which scratch finishes and create new spots for grime to cling to.
Done consistently, this routine means you’ll likely never face a fully clogged faucet again. The vinegar dissolves what’s starting to form, the baking soda lifts it away, and your stream stays strong and quiet year-round.
About the Author & Why Trust Viga Faucet
This guide was written by the Viga Faucet product education team and reviewed by our in-house quality-control engineers. Viga is a professional faucet manufacturer based in Kaiping, China — one of the world’s largest sanitary-ware production hubs — with over a decade of experience producing kitchen and bathroom faucets for clients across North America and Europe. Every faucet we ship is pressure-tested, salt-spray tested for finish durability, and built to international standards including cUPC and CE certification, and we back our products with a multi-year warranty on the cartridge and finish. Because we make these fixtures from the brass casting up, the maintenance advice here reflects how our products actually behave in real homes — not generic internet copy. To learn how we judge build quality, see our overview of how to identify the quality of a faucet.
FAQ
Can I mix vinegar and baking soda together to clean a faucet head?
You can, but use them in sequence rather than premixed. When combined, vinegar and baking soda neutralize each other and fizz into mostly water and carbon dioxide, which weakens both. Soak in vinegar first to dissolve the scale, then scrub with baking soda to lift and polish. That order gives you the full cleaning power of each.
How long should I soak the faucet head in vinegar?
Thirty minutes handles most everyday buildup. For heavy, hardened scale, soak up to a few hours. Avoid leaving brass, bronze, or other living finishes in vinegar overnight, since prolonged acid exposure can dull or strip the finish. Chrome and stainless steel can handle longer soaks safely.
Will vinegar damage my faucet’s finish?
Vinegar is safe for chrome and stainless steel even at full strength. For polished brass, oil-rubbed bronze, matte black, and gold finishes, limit contact to about 30 minutes and rinse well afterward. If you’re unsure, test on a hidden spot first or use the gentler lemon-juice method.
What if my faucet head won’t unscrew?
Wrap it in a cloth and try pliers or an adjustable wrench gently. If it’s a recessed (cache/female-threaded) aerator, you’ll need the small key that often comes with the faucet. If it still won’t budge, use the bag-soak method — fill a sandwich bag with vinegar, secure it around the spout for an hour, and the scale will loosen in place.
How often should I clean my faucet aerator?
Every three to four months for routine maintenance, or sooner if you notice the flow weakening or spraying. In hard-water homes, a quick quarterly vinegar soak prevents scale from ever hardening into a real clog.
My water pressure is still low after cleaning — what now?
Check that the under-sink shut-off valves are fully open, flush the supply lines with the aerator removed, and inspect the cartridge for scale or wear. Persistent low flow after a clean aerator usually points to a clogged cartridge, a kinked sprayer hose, or a deeper supply issue rather than the faucet head itself.
WeChat
Scan the QR Code with WeChat