
If you’ve ever stood in the tub pulling that little knob up and watching water keep pouring out the spout instead of the showerhead, you already know the frustration. Learning how to replace a tub spout diverter repair kit is the single most common DIY bathroom fix that homeowners avoid out of fear — and almost every one of them is surprised by how simple it actually is. This guide walks you through exactly what the diverter does, how to tell whether you need a small rebuild kit or a full spout swap, and the step-by-step replacement, plus the mistakes that turn a 20-minute job into a leaky weekend.
What Exactly Is a Tub Spout Diverter and Why Does It Stop Working?
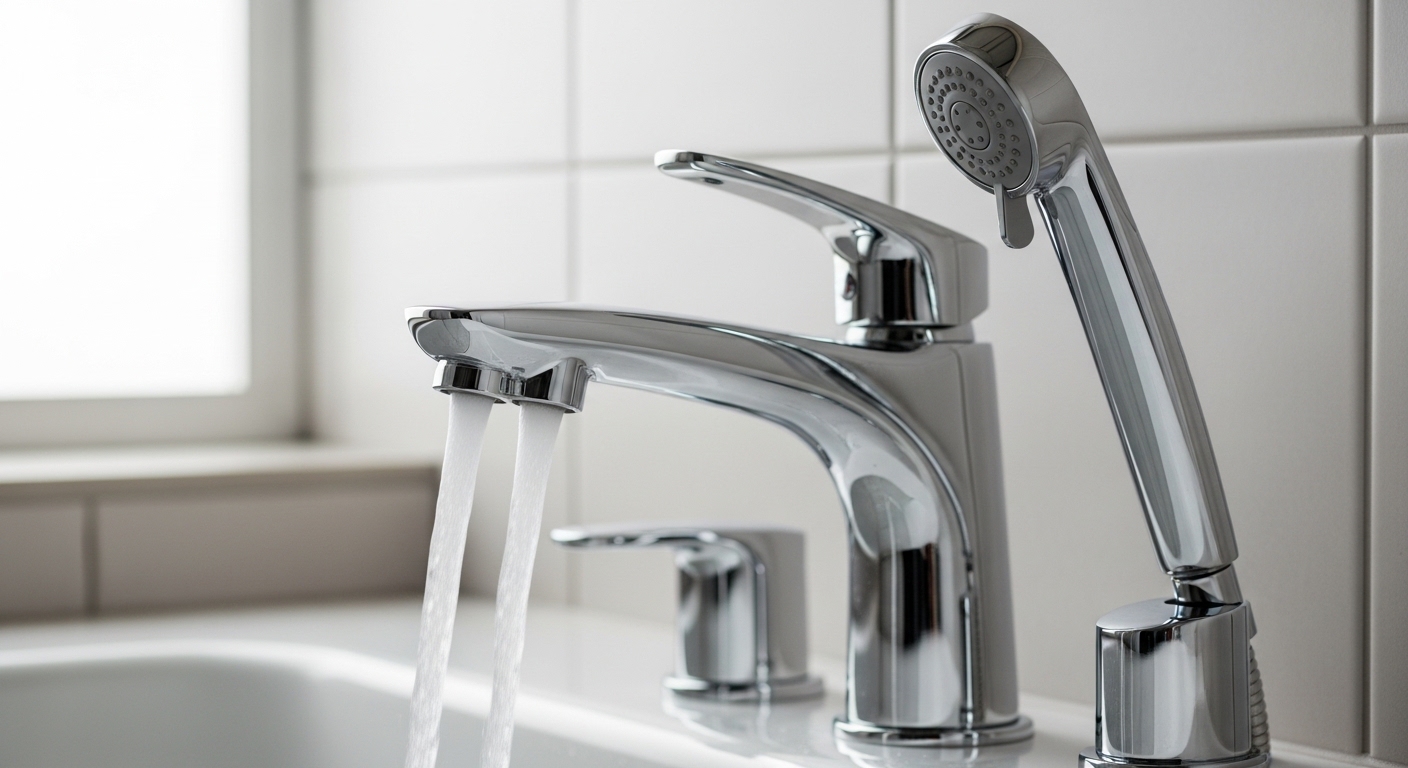
A tub spout diverter is the valve inside (or on top of) your bathtub spout that redirects water from the tub spout up to the showerhead when you lift the knob. It fails because the internal gate, washer, or O-ring wears out, gets clogged with mineral scale, or the spring loses tension — so water takes the path of least resistance and keeps dumping into the tub.
There are two broad designs you’ll run into. The first is the pull-up diverter, where a knob on top of the spout lifts to send water upward — this is by far the most common in American homes. The second is the three-valve diverter, a separate handle in the wall (usually between hot and cold) that turns to switch flow; that one isn’t part of the spout at all and is repaired differently. This guide focuses on the spout-mounted pull-up type, which is what 80%+ of “my shower won’t turn on” complaints actually are.
The good news: in most pull-up spouts, the diverter mechanism is built into the spout itself. That means a “repair kit” for this style is frequently the spout — you replace the entire spout rather than rebuilding tiny internal parts. A true rebuild kit (washers, gate, spring) exists for some premium and commercial spouts, but for the everyday hardware-store spout, swapping the whole unit is faster, cheaper, and longer-lasting.
How Do I Know If I Need a Repair Kit or a Whole New Spout?
You need a full spout replacement if your diverter is built into the spout (the knob sits on top of the spout) — which is the case for most homes. You only need a small internal repair kit if you own a higher-end or commercial spout that the manufacturer specifically sells rebuild parts for. When in doubt, replacing the entire spout is the safe default.
Here’s a quick self-diagnosis before you buy anything:
- Knob won’t stay up / drops on its own: The spring or gate is worn — replace the spout (or kit if available).
- Water comes out of both the spout and showerhead at once: The diverter washer isn’t sealing — classic worn-diverter symptom.
- Weak shower pressure but the spout fully stops: Often mineral buildup in the showerhead, not the diverter — clean that first before replacing anything.
- Diverter feels gritty or stiff: Hard-water scale is jamming the mechanism — common in hard-water regions.
That last point matters. If you live with hard water, scale is the number-one killer of diverters and aerators alike. It’s the same culprit behind clogged faucet heads, and the same maintenance habit helps — our walkthrough on how to clean a faucet head with vinegar and baking soda uses the exact descaling method that can sometimes revive a sticky diverter without any replacement at all. Try a vinegar soak before you assume the part is dead.
What Tools and Parts Do I Need to Replace a Tub Spout Diverter?
You need very little: the replacement spout or repair kit, an adjustable wrench or pipe wrench, an Allen/hex key (for slip-fit spouts), plumber’s tape, and a rag. Total parts cost is typically $10–$40, and you likely already own the tools.
Before you buy a spout, you must identify your connection type, because the wrong type simply will not fit. Here’s how the common options compare:
| Spout Type | How It Attaches | How to Identify It | Best For |
|---|---|---|---|
| Threaded (screw-on) | Threads onto a 1/2″ nipple pipe in the wall | Spout unscrews counterclockwise; no set screw visible | Most older and standard U.S. homes |
| Slip-fit (set screw) | Slides over a copper pipe, locked by a tiny set screw underneath | Small hex/Allen screw on the underside near the wall | Newer builds and modern fixtures |
| Telescoping / universal | Adapter kit fits either threaded or slip-fit | Sold as “universal fit” with multiple adapters | DIYers unsure of their connection |
| Rebuild kit (internal) | Replaces washers/gate/spring inside spout | Manufacturer sells named internal parts | Premium or commercial spouts only |
To find out which you have, reach under the spout near the wall. If you feel and see a small hex set screw, you have a slip-fit spout. If the underside is smooth and the spout turns when you twist it, it’s threaded. When you can, measure your existing spout’s length too — a spout that’s too short can leave the threaded nipple exposed.
How Do You Actually Replace the Tub Spout Diverter Step by Step?
Replace it in six steps: turn off the water, remove the old spout, clean the pipe, prep threads with plumber’s tape, install the new spout or kit, and test the diverter. Most people finish in 15–30 minutes.
- Shut off the water. For a spout swap you usually don’t strictly need to — no water flows when the valve is off — but turning off the bathroom supply or main is cheap insurance against a surprise. Open the tub valve briefly to confirm there’s no pressure.
- Remove the old spout. For a threaded spout, turn it counterclockwise by hand; if it’s stuck, slip a rag around it and use a pipe wrench, or insert a sturdy screwdriver/wooden dowel into the spout opening for leverage. For a slip-fit spout, loosen the set screw underneath with your hex key (don’t fully remove it — just back it out) and slide the spout straight off the pipe.
- Inspect and clean the pipe. Wipe the threaded nipple or copper pipe clean. Scrape off old tape, plumber’s putty, and any green corrosion or scale. A clean surface is what makes the new spout seal.
- Prep the threads (threaded type only). Wrap 4–6 turns of plumber’s PTFE tape clockwise around the pipe threads. Clockwise matters — it keeps the tape from unraveling as you screw the spout on.
- Install the new spout or repair kit. Thread the new spout on clockwise until snug and pointing straight down — hand-tight plus a gentle quarter-turn with a wrench is usually enough; don’t crank it or you’ll crack it. For slip-fit, slide the spout fully onto the pipe, then tighten the set screw against the copper. If you bought an internal rebuild kit instead, swap the old washer, gate, and spring for the new parts following the kit’s diagram, then reinstall.
- Test the diverter. Turn the water back on, run the tub, then lift the diverter knob. Water should climb fully to the showerhead with no leak at the spout base. Pull the knob a few times to confirm it holds.
This sequence — remove, clean, seal, reinstall, test — is the same disciplined approach behind nearly every fixture job. If you also want to tackle handle or cartridge issues while you’re in there, the logic carries straight over to our guide on single handle faucet removal the right way without calling a plumber, which covers the leverage and reassembly tricks in more depth.
Why Is Water Still Leaking From the Spout After I Replaced the Diverter?
If water still trickles from the spout when the diverter is up, the most common causes are: the new diverter washer isn’t seated, you didn’t tighten the spout enough so it’s spitting at the base, there’s debris stuck under the gate, or your water pressure is too low to fully engage the diverter. Work through them in that order.
A small amount of dribble from the spout right when you first divert is normal — diverters need a moment of flow to seat. Persistent streaming, though, points to a real problem:
- Base leaks where spout meets wall: Re-tape the threads and reseat the spout. This is almost always insufficient plumber’s tape or a spout backed off slightly.
- Both outlets run constantly: The diverter washer is missing, upside down, or the wrong size. Recheck the kit.
- Low pressure won’t lift water: Diverters rely on flow. If your home runs below ~45 psi, or your showerhead is heavily clogged, the diverter can’t build the back-pressure it needs. Descale the showerhead first.
- Cracked spout: Over-tightening cracks the spout body. Replace it and go gentler.
Diverter mechanics are closely related to how diverters work elsewhere in the home. If you want to understand the valve principle more deeply — how a single inlet splits flow to two outlets — our explainer on the kitchen faucet diverter and whether you actually need one breaks down the same engineering in a fixture you use every day. And if your whole project turns into a valve overhaul, how to change a kitchen tap valve covers the cartridge-and-seat side of the job.
Can You Repair a Tub Spout Diverter Without Replacing the Whole Spout?
Yes — but only if your spout was designed for it. Premium and commercial spouts often have a removable internal diverter assembly you can rebuild with a washer, gate, and spring kit. Standard big-box spouts are sealed units where replacing the entire spout is cheaper and easier than sourcing tiny parts.
Before you replace anything, try this free fix: remove the spout, soak it in a 50/50 white vinegar and warm water solution for 1–2 hours, then scrub the internal gate with an old toothbrush. Hard-water scale is the cause of a huge share of “broken” diverters, and a soak often restores smooth knob action completely. Reinstall and test before spending a dime. This descaling habit is the same one that keeps aerators and showerheads flowing, and it’s the cheapest maintenance in your whole bathroom.
If the soak doesn’t restore it and your spout takes a rebuild kit, follow the manufacturer’s exploded diagram exactly — order of washer, gate, and spring matters. If parts aren’t sold separately, don’t fight it: a $15–$30 replacement spout is the right call.
How Much Does It Cost and When Should You Call a Pro?
A DIY tub spout diverter replacement costs $10–$40 in parts and zero in labor. A plumber typically charges $100–$250 for the same job, mostly labor. You should only call a pro if your spout pipe is corroded into the wall, the nipple snaps off inside the fitting, or you have a three-valve in-wall diverter that needs the wall opened up.
Signs the job is bigger than a DIY swap:
- The threaded nipple breaks off flush with the wall during removal.
- You see active leaking inside the wall, not just at the spout.
- Your diverter is a wall handle (three-valve system) rather than spout-mounted.
- The copper pipe behind a slip-fit spout is pitted or split.
For everyone else, this is a textbook beginner repair. The same confidence applies to outdoor and utility fixtures too — if you’ve got a dripping exterior spigot on your list, the troubleshooting mindset transfers directly to our garden hose faucet repair guide.
FAQ
How long does it take to replace a tub spout diverter?
Most threaded and slip-fit spout replacements take 15–30 minutes for a first-timer, including cleanup. The actual swap is under 10 minutes; the rest is diagnosing your connection type and cleaning the pipe. A vinegar soak to revive an existing diverter adds 1–2 hours of mostly hands-off waiting.
Do I need to turn off the water to change a tub spout?
Technically no, because no water flows from the spout when the tub valve is closed. But shutting off the bathroom supply or main is smart insurance in case the valve seal is worn or you bump the handle. It costs nothing and prevents an unexpected spray.
Why does my tub diverter leak water out of the spout while the shower is running?
A worn or wrongly seated diverter washer is the usual cause — it can’t fully block the downward path, so some water escapes the spout. Low household water pressure or a clogged showerhead can also prevent the diverter from engaging. Replace the washer or spout, and descale the showerhead if pressure is weak.
Are tub spouts universal, or do I need an exact match?
Tub spouts are not universal by default — you must match the connection type (threaded vs. slip-fit) and ideally the length. However, “universal fit” spouts ship with adapters for both threaded and slip-fit pipes, making them a safe choice if you’re unsure. Always check the underside for a set screw to identify your type first.
Can hard water cause my tub diverter to stop working?
Absolutely. Mineral scale builds up on the internal gate and washer, making the knob stiff or preventing a full seal. A 1–2 hour soak in 50/50 white vinegar and warm water often dissolves the buildup and restores function without any replacement. In hard-water homes, descaling once or twice a year keeps diverters, aerators, and showerheads working.
What’s the difference between a diverter repair kit and a full spout replacement?
A repair kit replaces only the internal parts — washer, gate, and spring — and is sold mainly for premium or commercial spouts. A full spout replacement swaps the entire unit and is the standard fix for everyday spouts where the diverter is sealed inside. For most homeowners, replacing the whole spout is faster and more reliable.
A Note From the VIGA Team
This guide was written and reviewed by the product and engineering team at vigafaucet, a manufacturer of faucets, shower systems, and bathtub fixtures. Our diverters and tub spouts are pressure-tested and finished to meet international plumbing and durability standards, and we build them to be serviceable so a worn part never means a wasted fixture. We’ve handled thousands of diverter questions from homeowners and contractors, and the steps above reflect what actually works in real bathrooms — not just on paper. As always, follow your specific product’s warranty instructions, and when a repair exposes corroded in-wall plumbing, bring in a licensed plumber.
WeChat
Scan the QR Code with WeChat