 English
 Deutsch
 Français
 Italiano
 Español
 Português
 Nederlands
 Polski
 Русский
 日本語
日本語 한국어
한국어 العربية
 China Faucet Factory & OEM/ODM Faucet Manufacturer
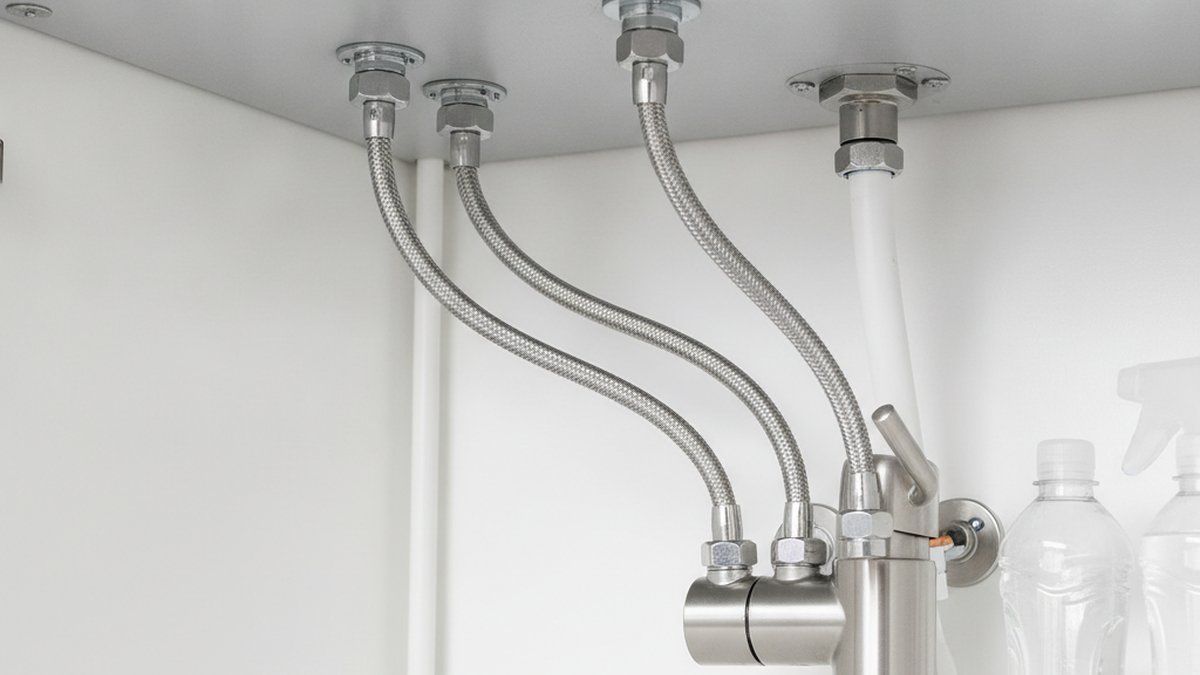
Choosing the right faucet supply line kitchen setup sounds trivial until you’re crouched under the sink holding a hose that doesn’t thread onto anything. The good news: it’s genuinely simple once you know the three numbers that matter — connector size on each end, and length. Get those right and you’ll never think about the part again. Get them wrong and you’re back at the hardware store, still with a dripping cabinet floor. This guide walks through exactly what to buy, what the sizes mean, how many lines you need, and how to install them without a plumber.
At VIGA, we manufacture and test faucets and their connection hardware, so we see every install mistake people make — and the supply line is the single most common one. Let’s fix that.
What is a kitchen faucet supply line, and what does it actually do?
A kitchen faucet supply line is the flexible hose that carries pressurized water from the shutoff valve on your wall (or under the sink) up to the faucet’s inlet. It’s the last link between your home’s plumbing and the faucet itself. In a standard kitchen, you have two of them: one for hot, one for cold.
These lines are sold in fixed lengths with a threaded connector permanently attached to each end. They handle constant water pressure — typically 40–80 psi in a residential home — 24 hours a day, so the material and the connectors genuinely matter. A cheap line that fails while you’re at work can flood a cabinet in hours. That’s exactly the scenario behind a lot of the “why is my cabinet floor wet” panic, and it’s closely related to a sink leaking from the faucet base, which people often misdiagnose as a faucet problem when the real culprit is a weeping supply connector.
What size supply line do I need for my kitchen faucet?
For 90% of modern kitchen faucets, you need a supply line that is 3/8″ compression on the valve end and 1/2″ FIP (female iron pipe) on the faucet end — the industry calls this a “3/8″ comp x 1/2″ FIP” line. Many newer faucets, especially pull-down and pull-out models, instead have thin copper or PEX inlet tails with a 3/8″ female fitting, so you’d want “3/8″ comp x 3/8″ comp.”
Here’s the part that trips people up: the “3/8 inch” on a compression fitting refers to the outer diameter of the tube it grips, not the inner diameter of the water passage. So a 3/8″ compression valve is standard almost everywhere in North American kitchens. The faucet end is where variation lives — check what your specific faucet came with before buying.
The three numbers you need before you buy:
- Valve-end connector: almost always 3/8″ compression (female).
- Faucet-end connector: either 1/2″ FIP (female) for traditional faucets, or 3/8″ comp/female for faucets with pre-attached inlet tubes.
- Length: measure from the shutoff valve to the faucet inlet, then add 3–4 inches of slack. Most kitchens need 16″ or 20″; deep or farmhouse sinks sometimes need 24″ or 30″.
A quick tip on length: longer than you need is fine — the extra hose just loops gently in the cabinet. Too short is a hard fail, because a taut supply line puts strain on both connectors and will eventually leak. When in doubt, size up.
Braided stainless vs. vinyl vs. copper — which supply line material is best?
Braided stainless steel is the best choice for a kitchen faucet supply line in almost every situation. It resists bursting, kinking, and corrosion far better than vinyl or plain PVC, and it costs only a dollar or two more. Rigid copper lasts a lifetime but is unforgiving to install because it must be bent precisely. Vinyl is cheap but the shortest-lived. Here’s how they stack up:
| Material | Typical lifespan | Burst resistance | Ease of install | Best for |
|---|---|---|---|---|
| Braided stainless steel | 8–10 years | Excellent | Very easy (flexible) | Almost every kitchen — the default choice |
| Braided PEX / nylon | 5–8 years | Good | Very easy | Budget builds, rentals |
| Vinyl / reinforced PVC | 3–5 years | Fair | Easy | Temporary or low-pressure use |
| Rigid copper | 20+ years | Excellent | Hard (needs bending) | Pros who want a permanent connection |
For the vast majority of homeowners, braided stainless steel is the sweet spot: reliable, cheap, and forgiving. Look for a line with a stated pressure rating (good ones are rated to 1,000+ psi burst) and, ideally, one that’s been tested to a recognized plumbing standard like ASME A112.18.6 or cUPC certification. That third-party testing is your assurance the hose won’t fail under normal household pressure.
Do I need one supply line or two for my kitchen faucet?
You need two supply lines for a standard kitchen faucet — one for hot water and one for cold — because the faucet mixes them internally to give you the temperature you set. There’s one exception: a cold-only setup like a dedicated pot filler or a reverse-osmosis drinking faucet needs just a single cold line.
If you’re installing a filtered water faucet alongside your main tap, that’s its own single cold-water run — the setup we cover in our guide on the brushed gold reverse osmosis faucet. And if your faucet is a modern pull-down with pre-attached inlet hoses, those hoses ARE the supply-side connection on the faucet end — you still connect two braided lines from them down to your two shutoff valves.
One more thing people forget: buy the lines in matching pairs. Using one old line and one new line is a false economy — the old one is the one that’ll leak next, and you’ll be back under the sink in a year.
How do I install a kitchen faucet supply line without a plumber?
You can install a kitchen supply line in about 10 minutes with an adjustable wrench and your hands — no plumber needed. The key rules: hand-tighten first, then only a quarter to half turn with the wrench, and never overtighten. Overtightening is the number-one cause of leaks, not undertightening.
- Turn off the water. Close both shutoff valves under the sink (turn clockwise until they stop). Open the faucet to release pressure.
- Measure and buy. Confirm your two connector sizes and the length you need (valve to faucet plus 3–4 inches of slack).
- Attach the faucet end first. Thread the line onto the faucet inlet by hand. If it’s a metal-to-metal compression or FIP fitting, no tape or sealant is needed — the connection seals on a rubber gasket inside the nut.
- Attach the valve end. Thread the other end onto the shutoff valve, hand-tight, then snug it with a wrench a quarter turn past hand-tight.
- Check the loop. Make sure the line curves gently and isn’t kinked, stretched, or bent sharply. A kink is a future leak.
- Turn the water back on slowly and watch both connections for 60 seconds. A single drop means back it off and re-seat the gasket — do not just crank harder.
Because supply-line gaskets seal on their own rubber washer, you generally do not need thread tape on braided-line connectors. Thread tape is for tapered pipe threads (like the shutoff valve’s inlet), not for the compression/FIP nuts on a supply hose. If you’re ever unsure which sealing method a given connection uses, our overview of how to fix a leak on a faucet yourself walks through when tape helps and when it actually causes leaks.
How often should I replace my kitchen faucet supply line?
Replace a braided stainless kitchen supply line every 8–10 years, or immediately if you see any rust spots on the braid, bulging, corrosion at the connectors, or a slow weep. Vinyl lines should be swapped every 3–5 years. And any time you replace the faucet itself, replace the supply lines too — they’re a few dollars and it’s the smart moment to do it.
Signs it’s time to replace right now:
- Rust-colored streaks or fraying on the braided sheath.
- A green or white crusty buildup at the connector nuts (mineral corrosion).
- Any moisture on the line or a drip at either end that returns after re-tightening.
- Stiffness or a visible bulge in the hose — a bulge means the inner tube is failing.
Hard water accelerates connector corrosion, so if you deal with mineral buildup elsewhere in your kitchen and bath, inspect your lines more often. A weeping supply line is also a frequent hidden cause behind the classic kitchen faucet leaking from the top complaint — water travels up the line, wicks along the faucet body, and shows up somewhere that looks unrelated.
What should I look for when buying a VIGA-compatible supply line?
Buy a braided stainless line that matches your two connector sizes, is rated to at least 1,000 psi burst pressure, and carries a recognized certification (cUPC or ASME A112.18.6). Beyond that, a few details separate a good line from a great one:
- Nut material: solid brass nuts outlast zinc-alloy or plastic ones, especially in hard water.
- EPDM inner core: this rubber resists chlorine and temperature swings better than cheaper vinyl cores.
- Length with slack: pick a length that lets the hose loop rather than pull taut.
- Warranty: a manufacturer confident in its line will back it. VIGA connection hardware is pressure-tested before it ships and covered by our limited warranty.
If you’re buying a new faucet at the same time, it’s worth confirming your sink’s hole configuration too, since that affects the whole install — our guide on the right kitchen faucet hole size for your sink covers how faucet mounting, deck plates, and supply routing all fit together.
FAQ
Are all kitchen faucet supply lines the same size?
No. The valve end is almost universally 3/8″ compression, but the faucet end varies — traditional faucets use 1/2″ FIP, while many pull-down faucets have 3/8″ inlet fittings. Always confirm both ends before buying. If you’re unsure, take the old line to the store or measure the connector’s inner threading.
Can I use a bathroom supply line for my kitchen faucet?
Sometimes, but check the length and connector sizes first. Bathroom lines are often shorter (12″–16″) because vanity plumbing sits closer to the faucet. A kitchen usually needs 16″–24″. As long as the connectors and length match your kitchen setup, the line itself is functionally the same.
Do I need Teflon tape on a braided supply line?
No, not on the supply-line nuts themselves. Braided lines seal with a built-in rubber gasket inside the connector, so tape isn’t needed and can actually prevent a proper seal. Use thread tape only on tapered pipe threads, such as where a shutoff valve threads into the copper stub-out.
Why is my brand-new supply line still leaking?
The two most common causes are overtightening (which crushes or rolls the rubber gasket) and a missing or misaligned gasket. Turn off the water, unthread the connector, check that the rubber washer is seated flat and undamaged, then re-tighten only hand-tight plus a quarter turn. If it still leaks, the gasket is damaged — replace the line.
What length supply line should I buy if I’m not sure?
When unsure, buy 20″ for a standard kitchen or 24″–30″ for a farmhouse or deep sink. Extra length simply loops gently in the cabinet and causes no harm, while a too-short line strains the connectors and leaks. Measure from your shutoff valve to the faucet inlet and add 3–4 inches of slack.
Can one burst supply line really flood my kitchen?
Yes. A failed supply line runs at full household pressure continuously and can release hundreds of gallons an hour. This is exactly why braided stainless steel with a high burst rating and third-party certification is worth the extra dollar or two over vinyl — it’s the cheapest insurance in your kitchen.
Author note: This guide was written by the VIGA product team, drawing on our experience manufacturing, pressure-testing, and installing kitchen and bathroom fixtures. VIGA designs faucets and connection hardware to ASME and cUPC standards, and every supply component is tested under pressure before shipping. As always, if your local plumbing code has specific requirements, follow it — and when a job is beyond your comfort level, call a licensed plumber.
WeChat
Scan the QR Code with WeChat